Assignment
Work through a Git tutotial to build a personal site in the class archive describing you and your final project.
HTML-CSS-Git
Steps used to build the website Step I HTMLHTML is the abbreviation for Hyper Text Markup Language.
HTML is a coding language to create web pages.
Brackets is one of the softwares used for writing and reading an HTML code.
Hypertext are the hyperlinks or data that the HTML page contains.
The Markup Language refers to the definition of tags used to define the webpage layout and different elements.
To understand the HTML coding language I had to search for tutorials that explain the different elements.
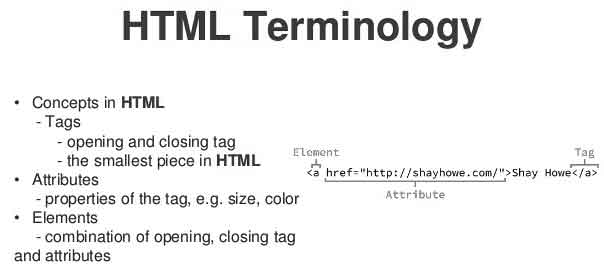
A Markup Language is a way that computers speak to each other to control how text is processed and presented. To do this HTML uses two things: tags and attributes.
Below are what I learned from the tutorials:
Defining Tags and Attributes:
Tags and attributes are the basis of HTML.
They work together but perform different functions.
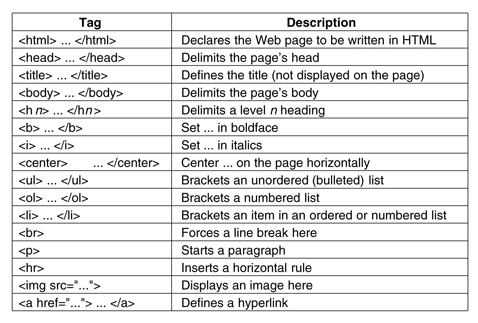
HTML Tags are:
Tags are used to mark up the start of an HTML element and they are usually enclosed in angle brackets.
Tags are the formatting tools that HTML uses to name the contents like paragraphs, headings, sections ...
Most tags must be opened and closed in order to function.
HTML Attributes are:
Attributes contain additional pieces of information.
Attributes take the form of an opening tag and additional info is placed inside.
In this instance, the image source (src) and the alt text (alt) are attributes of the tag.
Rules to remember:
The vast majority of tags must be opened and closed with the element information such as a title or text resting between the tags.
When using multiple tags, the tags must be closed in the order in which they were opened.
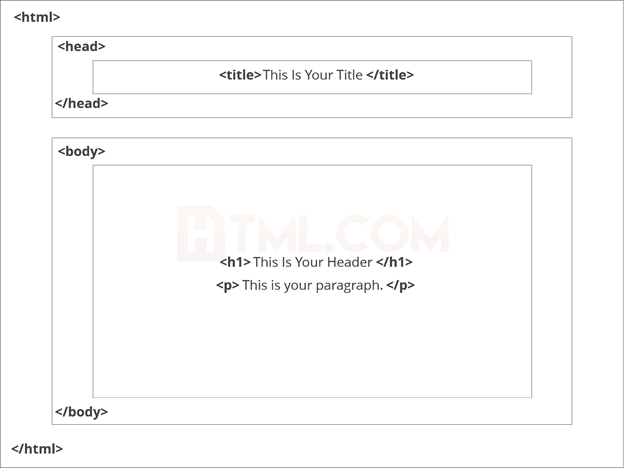
Basics of an HTML Page
The below tags should be placed underneath each other at the top of every HTML page that you create.

1- This tag specifies the language you will write on the page. In this case, the language is HTML 5.
2- This tag signals that from here on we are going to write in HTML code.
3- This is where all the metadata for the page goes — stuff mostly meant for search engines and other computer programs.
4- This is where the content of the page goes.
Adding Text in HTML
Adding text to our HTML page is simple using an element opened with a tag which creates a new paragraph. We place all of our regular text inside the element.
Adding Links in HTML
Links are included in an attribute opened by the tag. (check above image)
The first part of the attribute points to the page that will open once the link is clicked.
The second part of the attribute contains the text which will be displayed to a visitor in order to entice them to click on that link.
Adding Images in HTML
Images explain everything in a website. The img tag has everything you need to display images on your site. img also contains an attributes.
The attribute features information for your computer regarding the source, height, width, and alt text of the image.
CSS and HTML
The first thing to understand when approaching the topic of CSS is when to use a styling language like CSS and when to use a markup language such as HTML.
All critical website content should be added to the website using a markup language such as HTML.
Presentation of the website content should be defined by a styling language such as CSS.
Posts, page headings, video, audio, and pictures that are not part of the web page presentation should all be added to the web page with HTML. Background images and colors, borders, font size, typography, and the position of items on a web page should all be defined by CSS.
CSS should be used to add content to a web page. Instead, CSS is used to pick items that already exist on a web page and to define how each item should appear.
In order to make it as easy as possible to select items on a web page, identifiers should be added to elements on the webpage. These identifiers, often called hooks in the context of CSS, make it easier to identify the items that should be affected by the CSS rules.
Step II CSS
CSS is the abbreviation for Cascading Style Sheets.
CSS is used to give a style to an HTML document.
CSS files are to specify the information related to font, size, color, spacings etc... of an HTML file to appear on the web page.
Internal Stylesheets:
An internal stylesheet is a block of CSS added to an HTML document head element.
The style element is used between the opening and closing head tags, and all CSS declarations are added between the style tags.
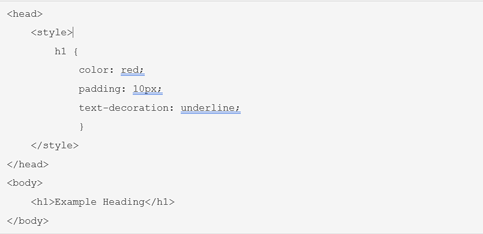
That code would produce the same results as the inline styles. However, the benefit to using internal stylesheets rather than inline styles is that all h1 elements on the page will be affected by the styles.
Defining a style for the different elements in the CSS file.
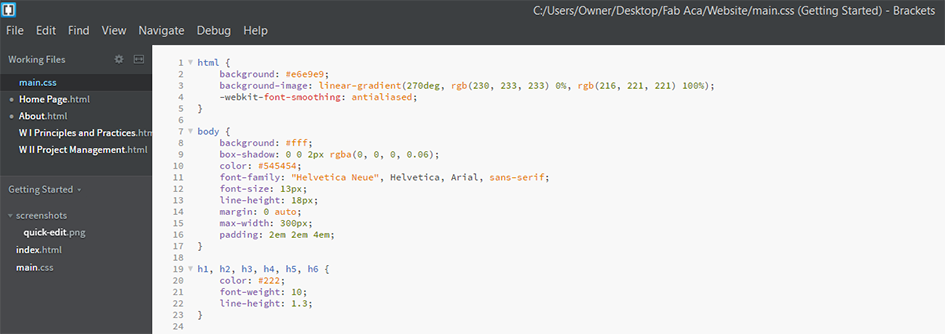
As a convention in the image naming I tried to give each image a name that would be easy for me to locate each week especially while doing the weekly assignments. Abbreviations of the image (description) with sometimes a number.
Step III Git-Bash ConfigurationIn the first step we downloaded Git from the website Git-scm
Git basic commands:
git clone creates a local copy of a project that already exists remotely. The clone includes all the project’s files, history, and branches.
git add any changes that are performed will become a part of the next snapshot and a part of the project’s history. Performing and committing separately gives developers complete control over the history of their project without changing how they code and work.
git commit in short, a commit functions like taking a photo. Anything that has been performed with git add will become a part of the snapshot with git commit.
git status shows the status of changes as untracked, modified, or staged.
git pull updates the local line of development with updates from its remote counterpart.
git push updates the remote repository with any commits made locally to a branch.
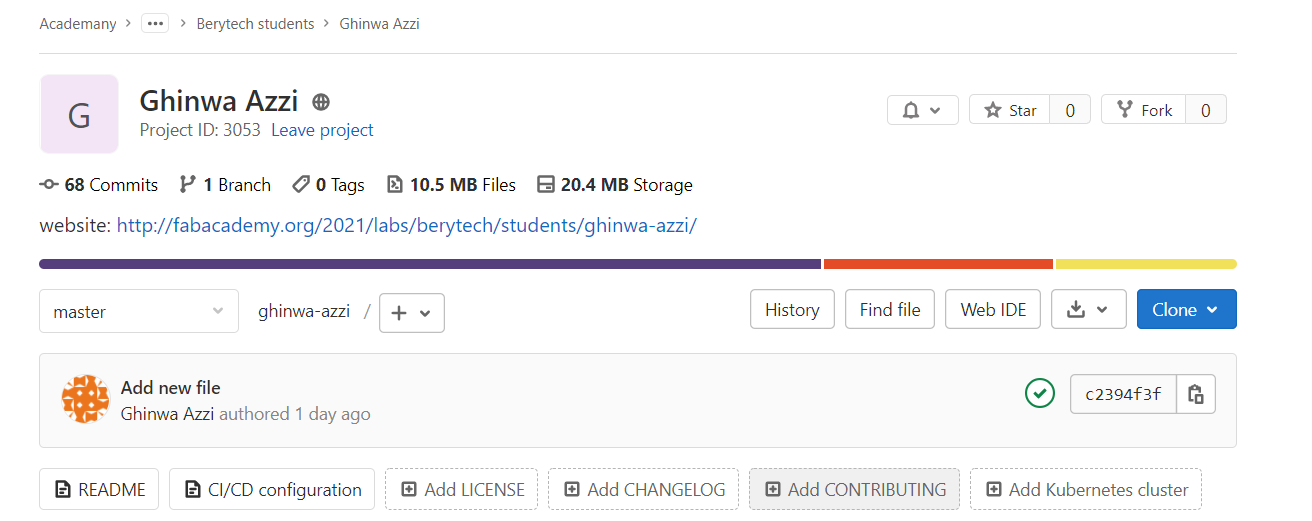
New repository and publish it to GitHub
First we create a new repository on GitHub.
Repository is also named as Git project is the entire collection of files and folders related to a project with all the history.
The file history appears as snapshots in time called commits.
Repositories are self-contained units and anyone who owns a copy of the repository can access the entire codebase and its history. A git repository also allows for: interaction with the history, cloning, committing, merging, comparing changes across versions of code, etc. …
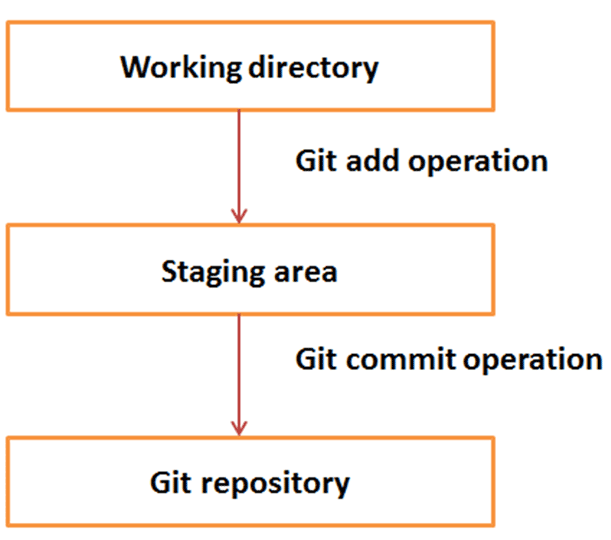
Basic workflow of Git:
1- You modify a file from the working directory.
2- You add these files to the working area.
3- You perform commit operation that moves the files from the working area. After push operation, it stores the changes permanently to the Git repository.
Setting up a username
For the configuration we had to do several steps:
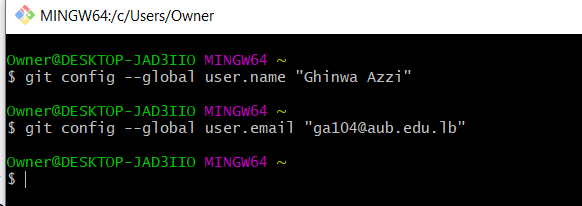
First configure your global username and email address after installing Git.
To set your global username/email configuration:
Set your username: git config user.name "FIRST_NAME LAST_NAME"
Set your email address: git config user.email "MY_NAME@example.com"
Verify your configuration by displaying your configuration file: cat .git/config
In my case:
Username and email git config --global user.name "Ghinwa Azzi" and git config --global user.email ga104@aub.edu.lb
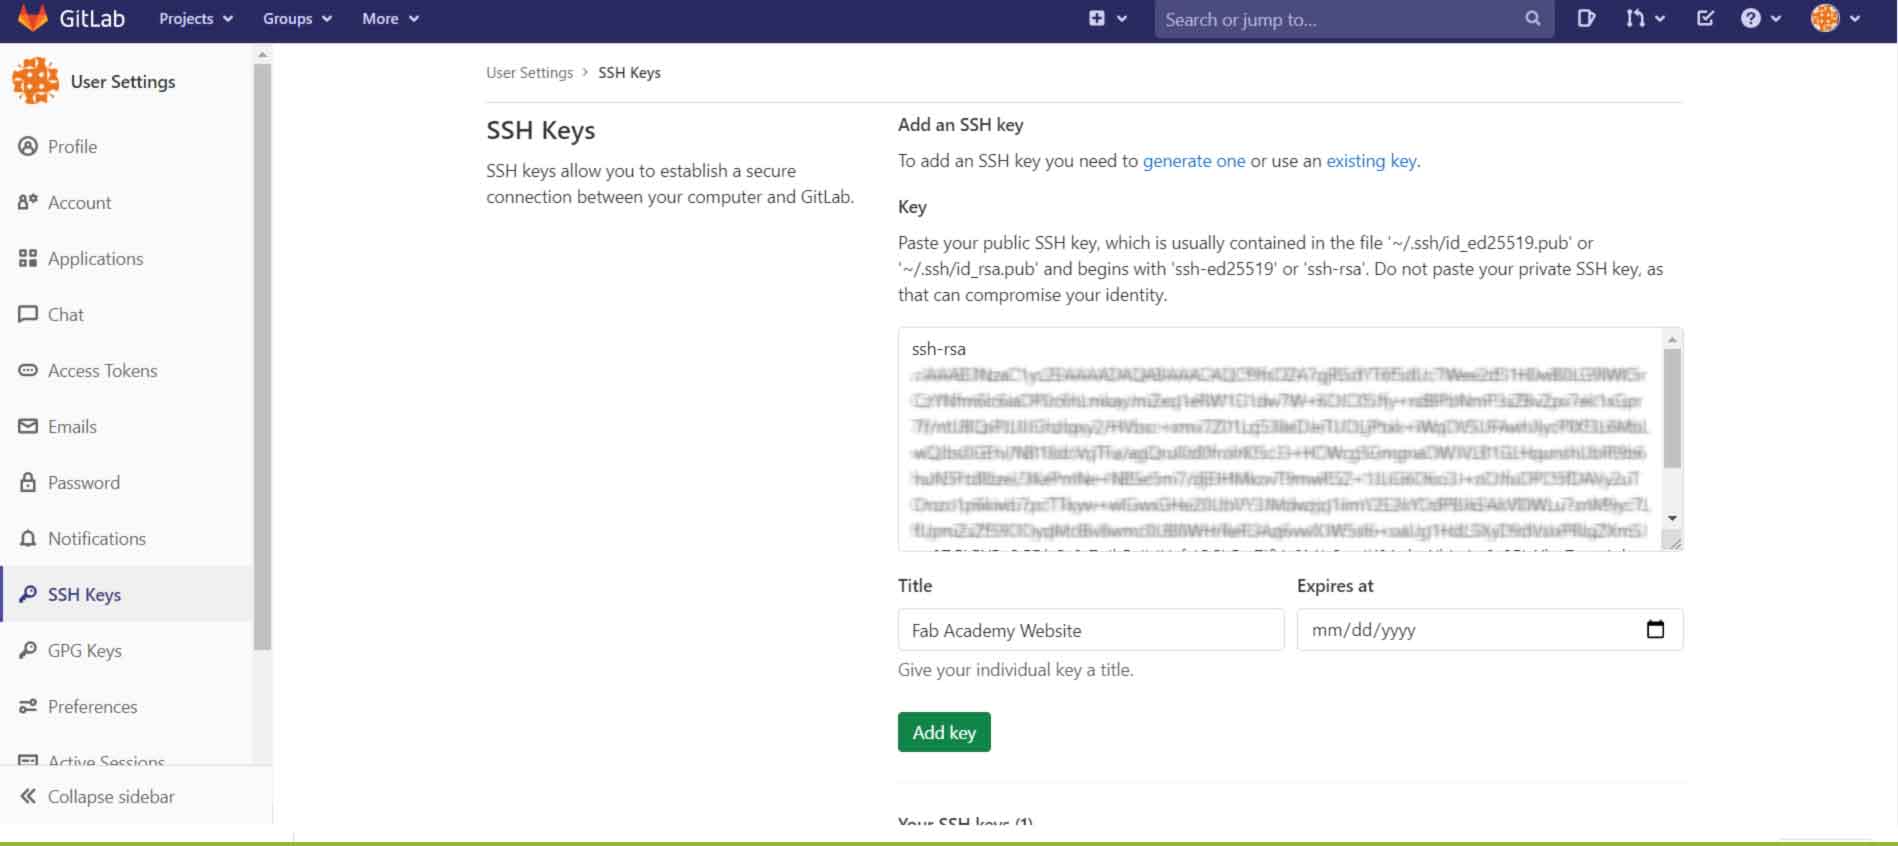
Then in Git Bash we generated and enabled an ssh key:
Bash is an acronym for Bourne Again Shell. A shell is a terminal application used to interface with an operating system through written commands.
ssh-keygen -t rsa -b 4096 -C "ga104@aub.edu.lb"
Owner/.ssh/id_rsa.pub

The next step is to login to the gitlab account and copy paste the SSH KEY
Uploading the Website
git clone is a Git command line utility which is used to target an existing repository and create a clone, or copy of the target repository.
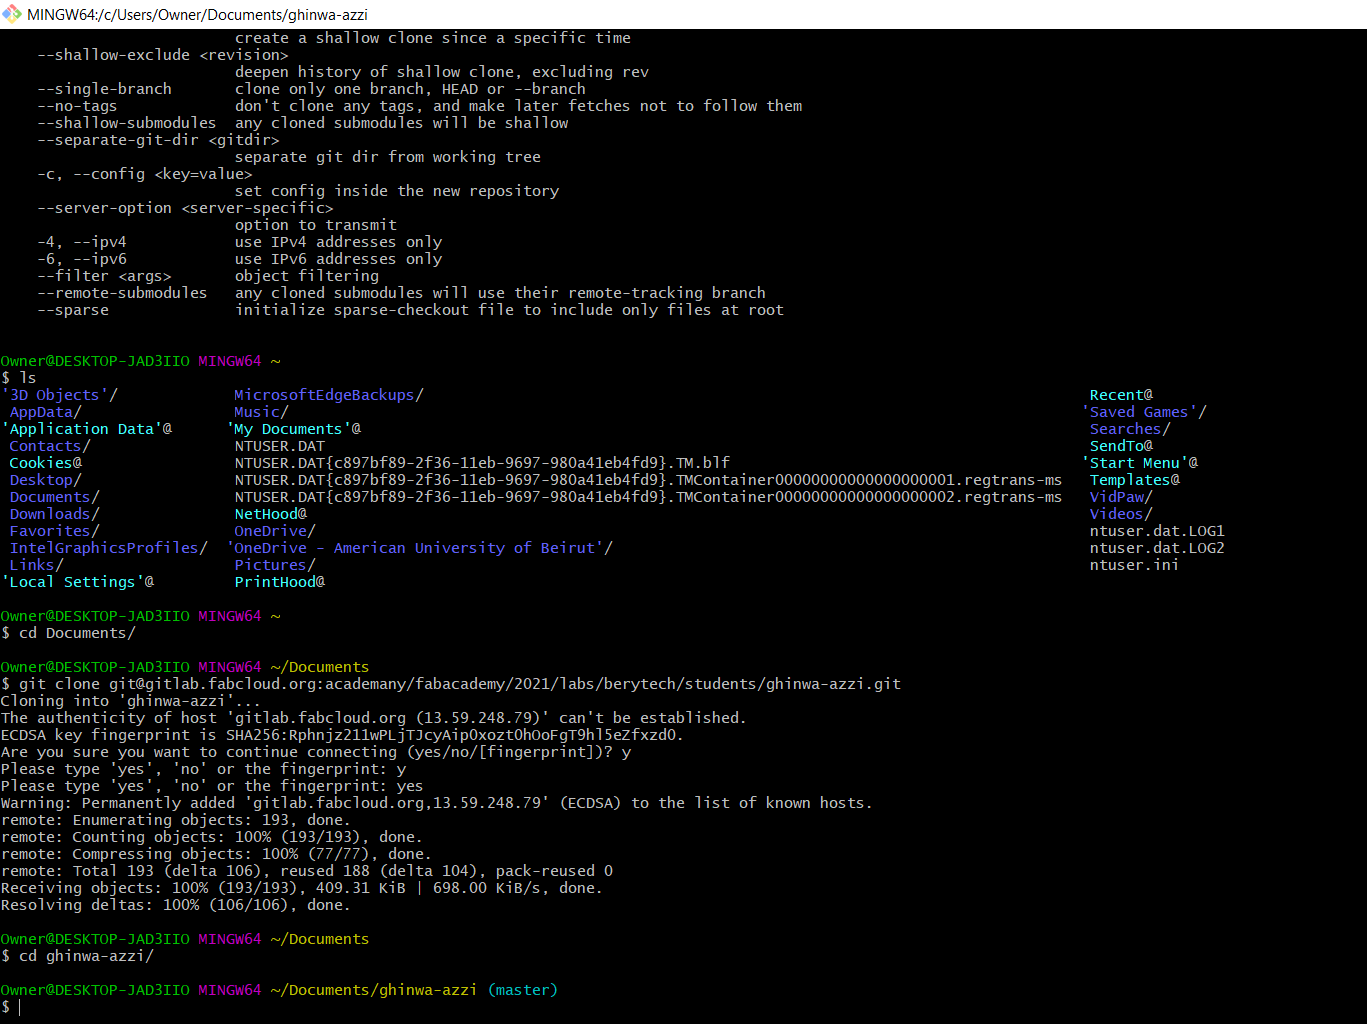
Now we have to clone the git repository file on a local folder on our computers
git clone git@gitlab.fabcloud.org:academany/fabacademy/2021/labs/berytech/students/ghinwa-azzi.git
git clone is primarily used to point to an existing repo and make a clone or copy of that repo at in a new directory, at another location.
The git clone command copies an existing Git repository.
Saving Changes
Then we did the below steps:
To locate the repository folder: cd/path/to/repository
The git add command adds a change in the working directory to the staging area. It tells Git that you want to include updates to a particular file in the next commit.
To add all the new files that we want to appear on the webpage: git add*
Changes are not actually recorded until you run git commit.
The git add and git commit commands compose the fundamental Git workflow.
To send all the files to the local repository and commit the changes: git commit -m "add name"
In addition to git add and git commit, a third command git push is essential for a complete collaborative Git workflow.
git push is utilized to send the committed changes to remote repositories for collaboration.
This enables other team members to access a set of saved changes.
To send all the files to the server: git push origin master
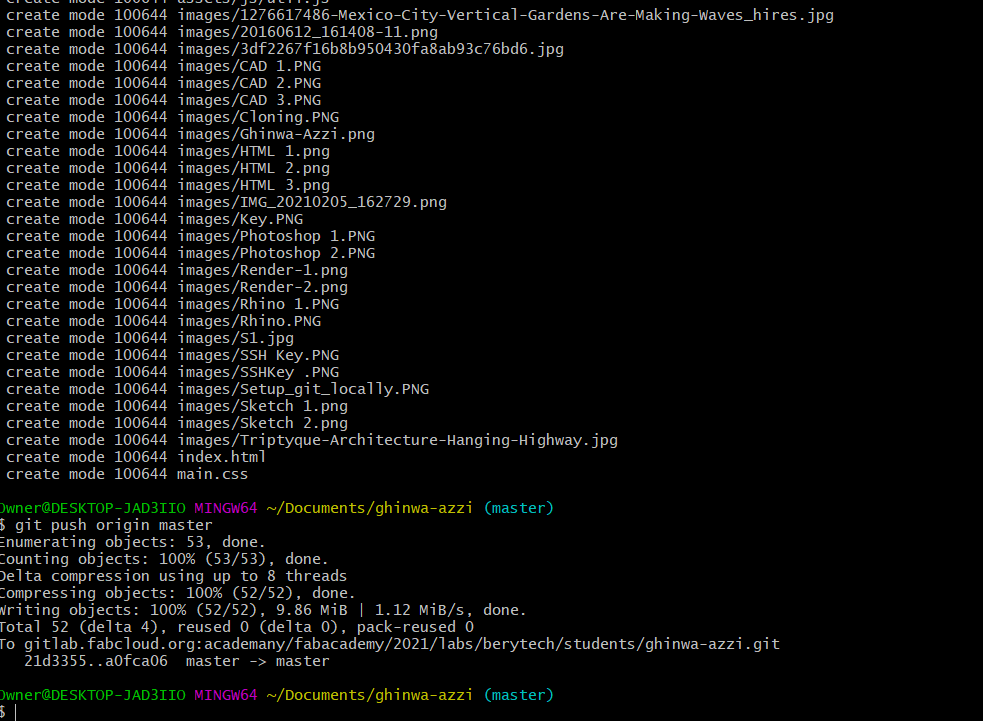
When we need to update our webpage we have to do all the last three steps and we will have an updated version.
Sometimes two more steps are needed:
git pull origin master and git status to pull and check all the changed files.
In the GITLAB account we had to delete the old YML file and create a new one in order to get the website online.
Reference to: w3schools, several online tutorials like GitHub Guides and online template from templated.co

This work is licensed under a Creative Commons Attribution-NonCommercial-ShareAlike 4.0 International License